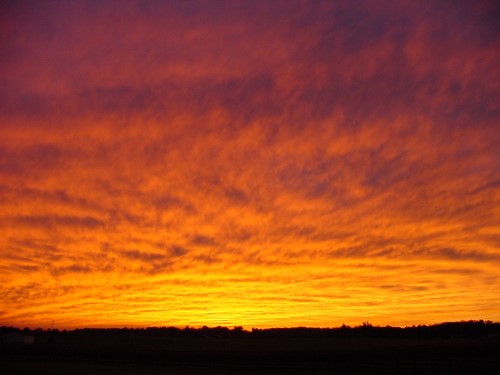
My wife and I live on a small 10 acre horse farm. Actually, the horse community calls it a hobby farm since it is solely for our recreation with no commercial interests. It is a wonderful place to call home. As an added bonus the sunsets here are breathtaking at times.
However, keeping that much acreage groomed is no small task in the summer. With all of the outside chores this time of year it is challenging to find the time to work on the basement finishing project. Add to this I have been investing a lot of hours at work lately. I am trying to keep pace with the workload coming my way. As a salaried employee I am measured by work output rather than workweek hours. Consequently there are some weeks that may need 60-70 hours of my time. And there seems to have been many of these lately. I am not complaining, it is all worth it at the end of the day. But it greatly slows down lower priority activities such as the basement drywall.
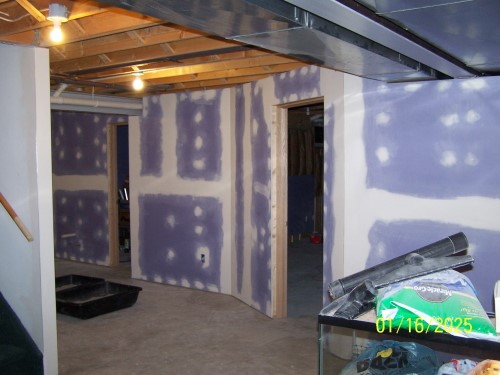
Still, we are making progress albeit slowly. The plasterwork is completely finished in the basement center room. People in the building trades will probably have a good laugh over my technique but it works for me and the results are extremely smooth, straight walls. After the taping plaster dried thoroughly I applied a substantial coat of joint compound to each joint. When that was dry I flat sanded it with a 10″ hand board and 150g sandpaper until it was level and flat. Next I put another coat of joint compound over all the joints again to pickup any low spots observed during the initial sand, extend the feather edges, and fill the 150g scratches. This coat of joint compound along with the prior coat were both pretty heavy applications. I didn’t spend a lot of time during the compound spreading to make it look all that pretty but I did make sure to taper the feather edge as best as possible. Sanding is aggressive on the drywall paper face and so I wanted to minimize the amount of feather edge sanding. I initially sanded this coat the same as the one before – 10″ hand board and 150g sandpaper – but only to knock off the bulk high spots. Then I switched to 220g sandpaper on the same 10″ hand board and finished sanding until everything was as level and smooth as I could make it. Because of the two heavy applications of joint compound there were lots of pinholes visible after the walls were vacuumed. This was expected. A super thin application of joint compound over the joints filled the pinholes. I did the pinhole filling application by holding the trowel at near 90 degrees to the wallboard and pressing firmly. This resulted in filled pinholes with very little residual plaster elsewhere. A quick hand sand with 220g sandpaper and a final vacuuming made the room ready for paint.
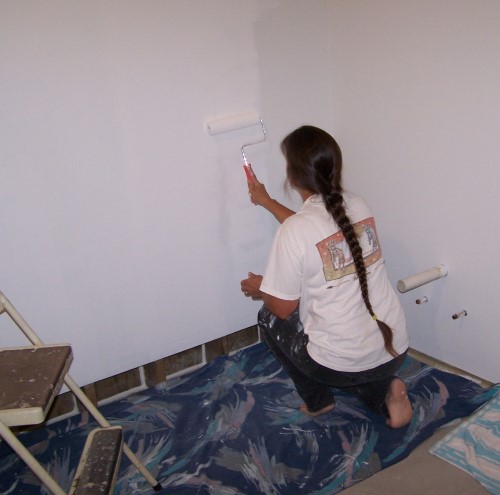
My wife is spectacular. Not only is she a loving, kind, gentle person that takes good care of me, our animals, and the household, she is also an excellent painter. She is applying the PVA primer and finally the eggshell latex paint to the walls. There will be two different colors used in the area shown. The walls on the right hand side (under the HVAC ducting) over to the 90 degree corner will be the same industrial looking gray color used in the workshop. This carries the color theme from the workshop into this room since they are in a way the same room. A quick glance back to the basement floor plan explains the arrangement. From the 90 degree corner on around the rest of the room ending at the stairwell will be Behr Polar Bear White. The white will keep the area bright and from looking so small. Polar Bear white was also used in our kitchen where it provides a very clean, sterile look. Perfect color for a kitchen. It was natural to use the same color white in the basement.
We are going to finish this room entirely before moving on. This will allow us to put things in their new permanent place and begin to end the constant reshuffle of stuff around the basement. Next, the bathroom will be made operational, plastered and painted. The drywall is already hung in the bathroom. At the moment it is serving as our temporary storage area. The only room to go after that is the train room itself. Whew, all this just to have a model railroad! I would expect the bathroom to be finished by fall and the outside chores will have lessened their demand of our time by then so it looks like train room work will begin in earnest sometime around November. At least that’s the plan right now. 🙂
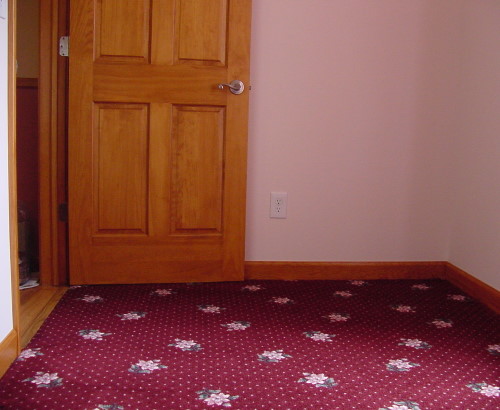
 Oh, and by the way if we didn’t already have enough projects going on take a look at my wife’s office new flooring. Isn’t it pretty? We love it! The original plan was to use in this room the laminate flooring removed from the kitchen. But we ended up three pieces shy and the pattern is no longer available. We had no choice but to buy something new. You know what they say “The greatest plans of mice and men…”. Well, this is another plan that didn’t go according to plan! Hate when that happens. Since my wife is being so kind as to paint my basement drywall work for me there is no way I could force her to continue walking on bare subfloor in her office. 12 yards of carpet put this project on the Done list.


Looks the wife has put some rather mighty nice finishes to the basement project. I can”t wait to see the LK&O Railroad come to life!
I see the top photo was taken 11 years from now – and it’s still not done?
I found your blog via an LED thread on MRH. I’m currently working out lighting details on my railroad room so found that immediately applicable. Given that you’ve documented the remainder of the build so well (style and coverage), I thought it worth while to see what else you’ve done and how you implemented it. The plus side for me is that I will see your work progress at a far faster rate than you did…
Plus, the AC&Y has always interested me – a shorter flatland railroad with a diverse freight mixture. Good for modeling.
Matt Goodman
Columbus, OH
Too funny. Yes Matt my railroad started out completely finished in the year 2040. This blog documents its deconstruction in reverse chronological order. hehehehe
Funny things happen sometimes when you change out the batteries in the camera!
Glad to have a fellow AC&Y fan following along.