Lloyd, this post is for you. And thank you for the compliments.

XtrackCAD
The railroad was designed in XtrackCAD, a popular track planning program you are probably familiar with. Control panel art starts with the XtrackCAD file.
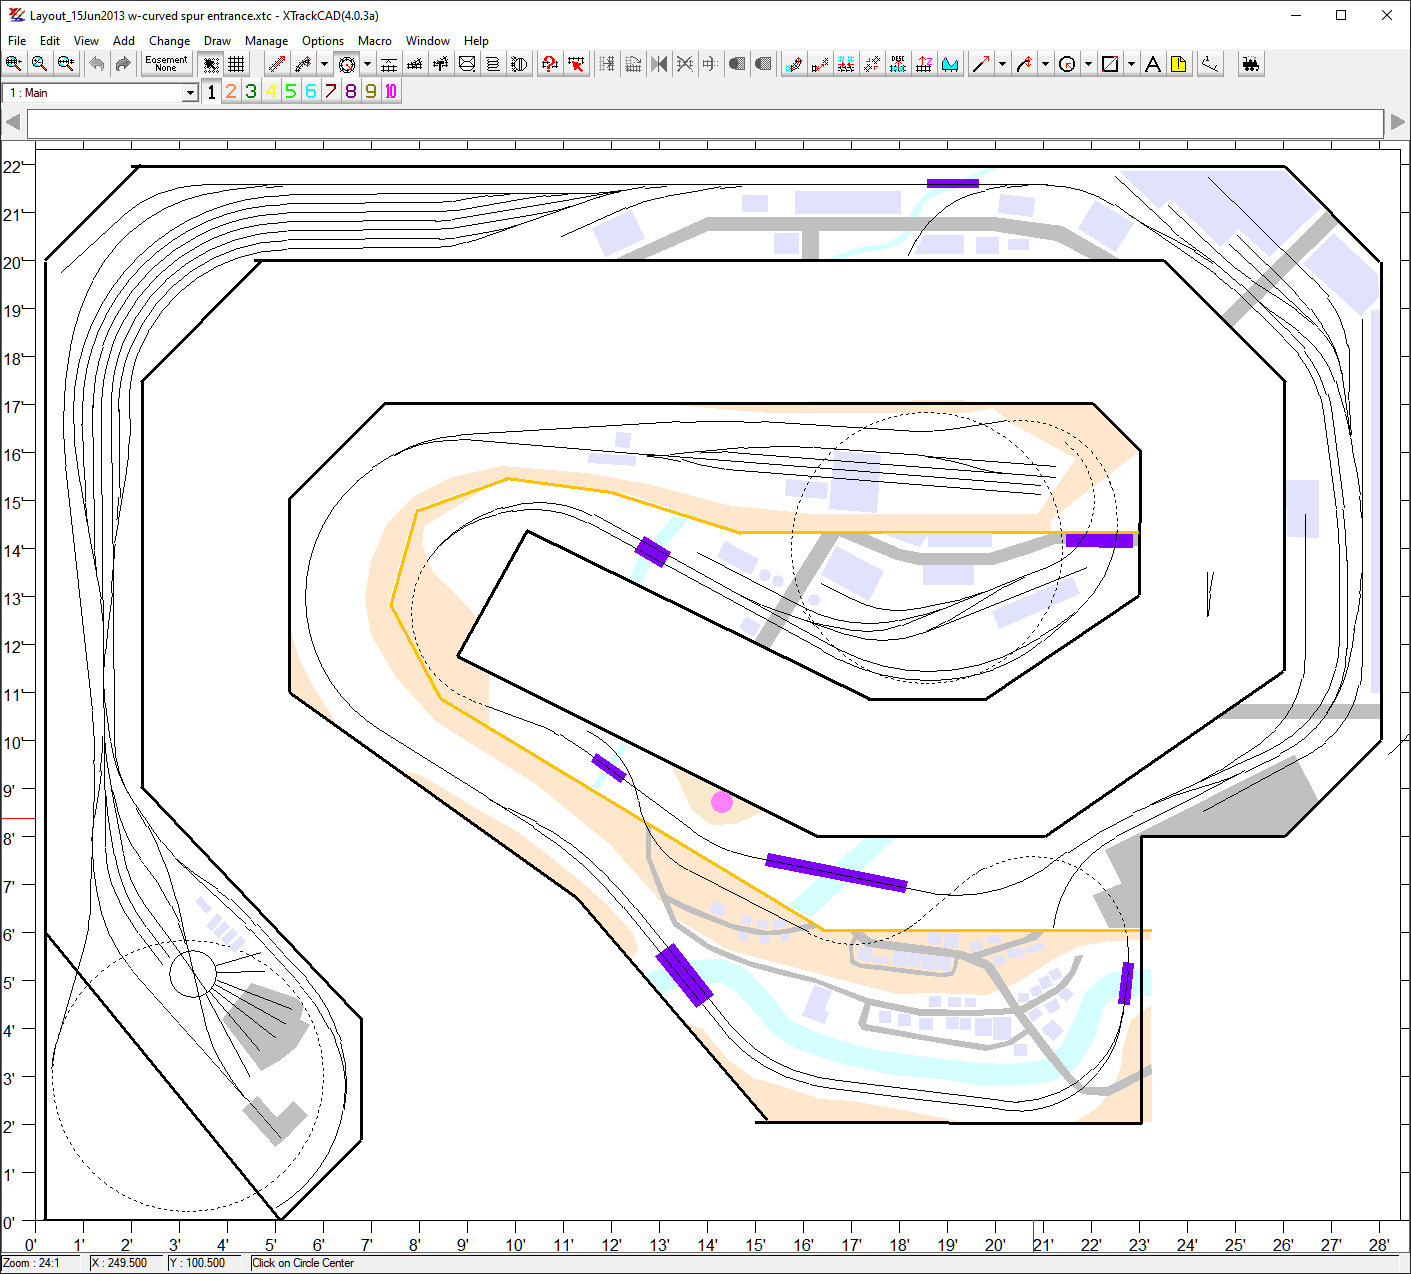
XtrackCAD uses vector graphics. That’s a great thing. Vector art is the secret to a clean, sharp print. While XtrackCAD is excellent for track planning purposes, it leaves a lot to be desired as an art tool. I suppose it is possible to make panel art in XtrackCAD although I think you will find it to be a challenge. Much easier to use a full featured program specifically made for creating and manipulating vector objects. My choice is Adobe Illustrator although there are many other suitable programs available, CorelDRAW and Inkscape (free) for example.
If you aren’t familiar with a vector art program don’t worry. You can make nice art for control panels using only their most elementary tools. Everything you need to know will be covered in their first tutorial.
Illustrator doesn’t recognize the native .XTC format of XtrackCAD but it does recognize .DXF format which XtrackCAD is capable of exporting. Before exporting I turn off all labels, draw ties, and two rail options.
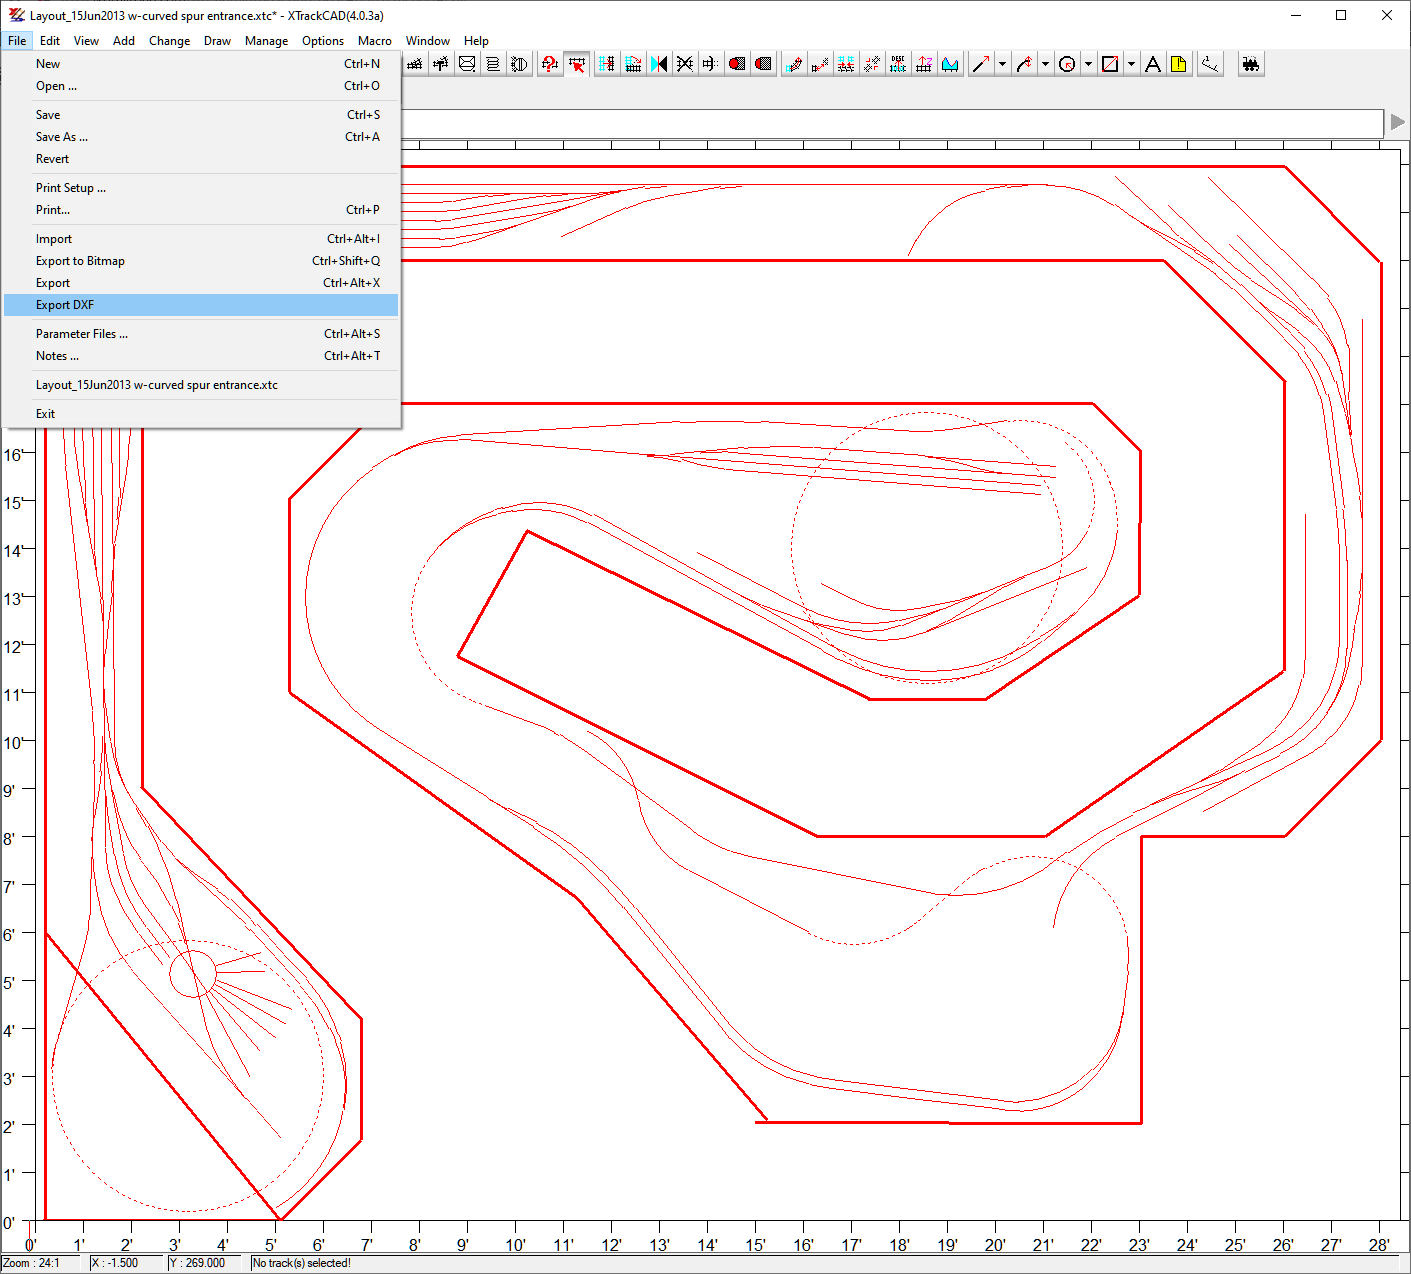
I hide all the layers except track and benchwork and then select all, export DXF. The benchwork is taken along as an aid to help me keep my bearings.
Adobe Illustrator
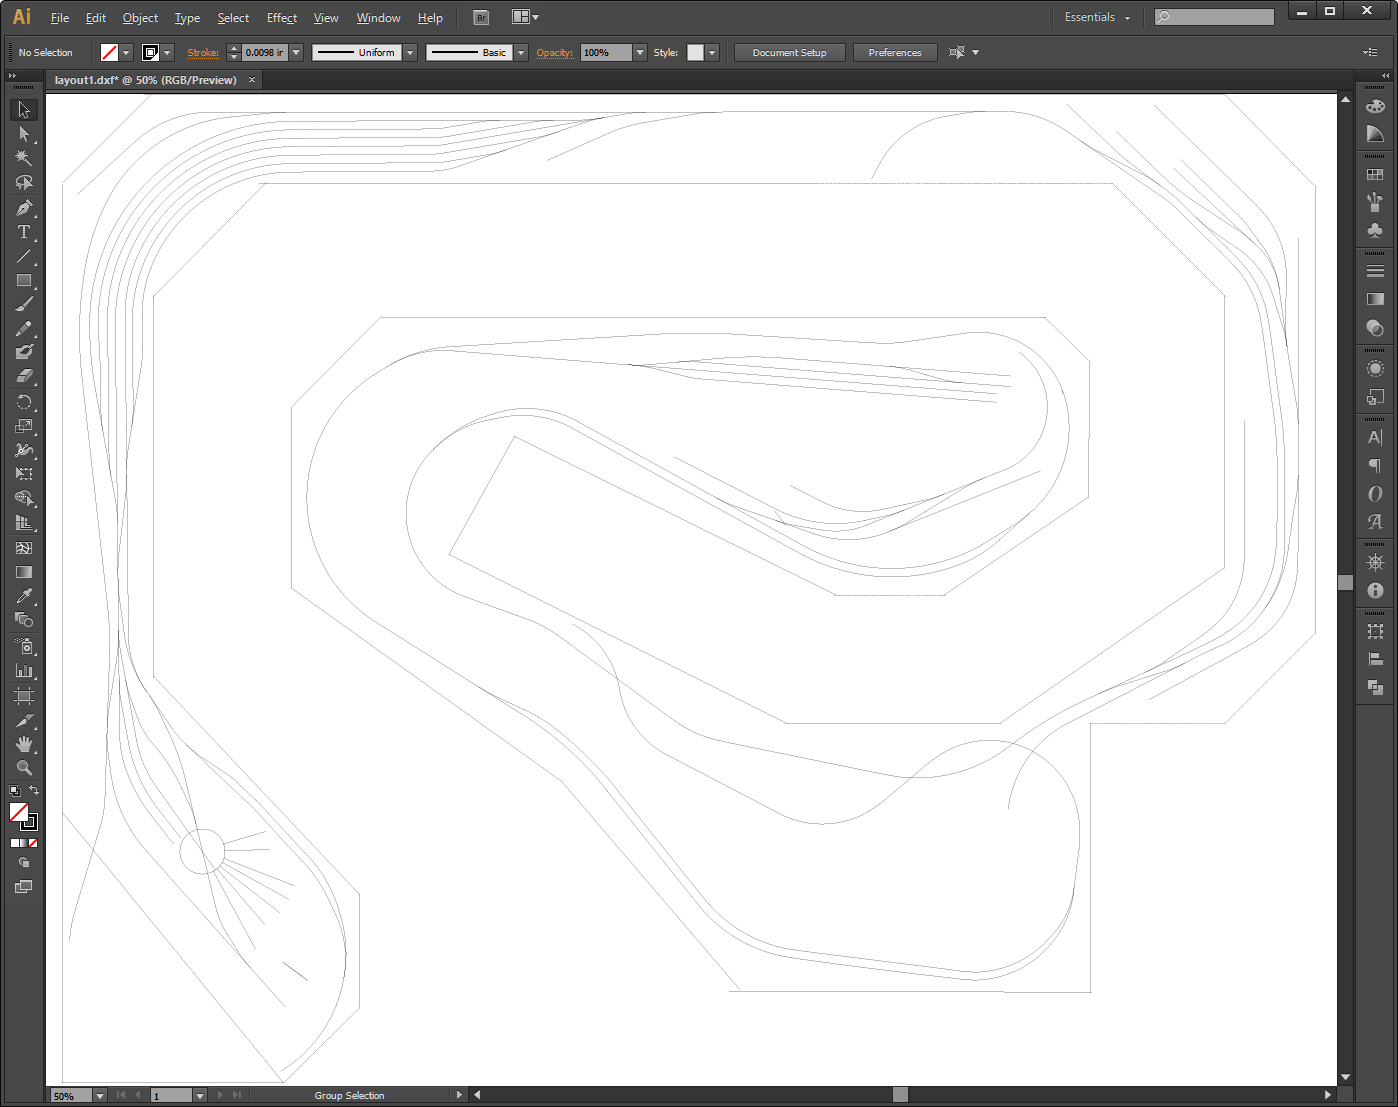
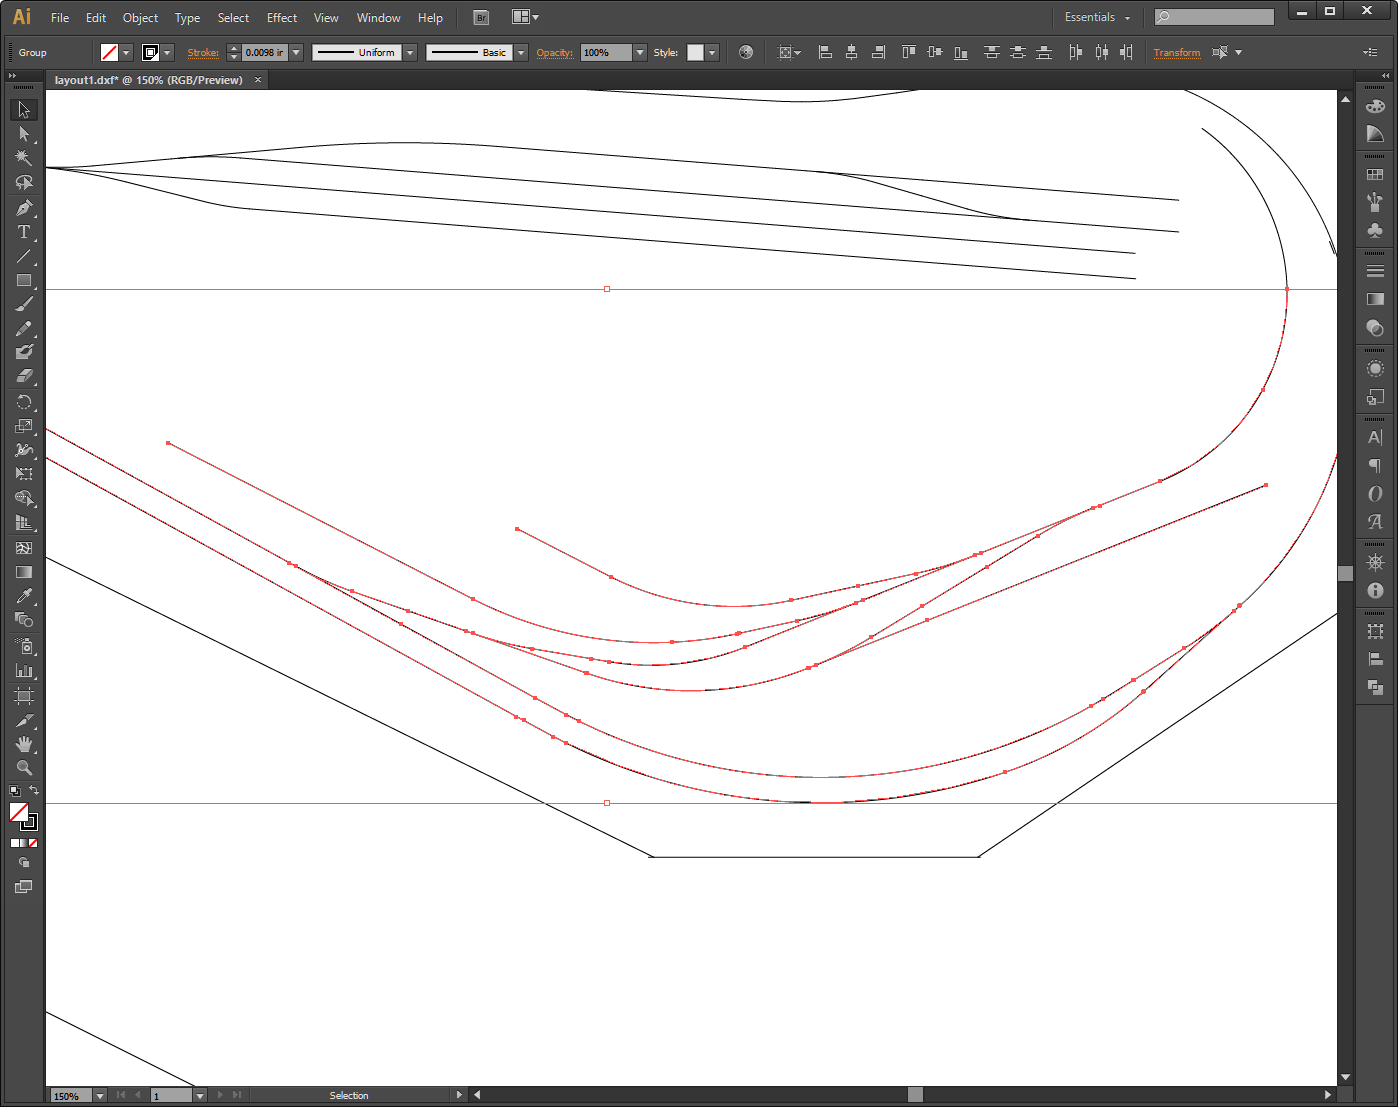
When the .DXF file is opened with Illustrator it looks like this. The track profiles are preserved and ready to edit with all the powerful tools Illustrator has to offer.
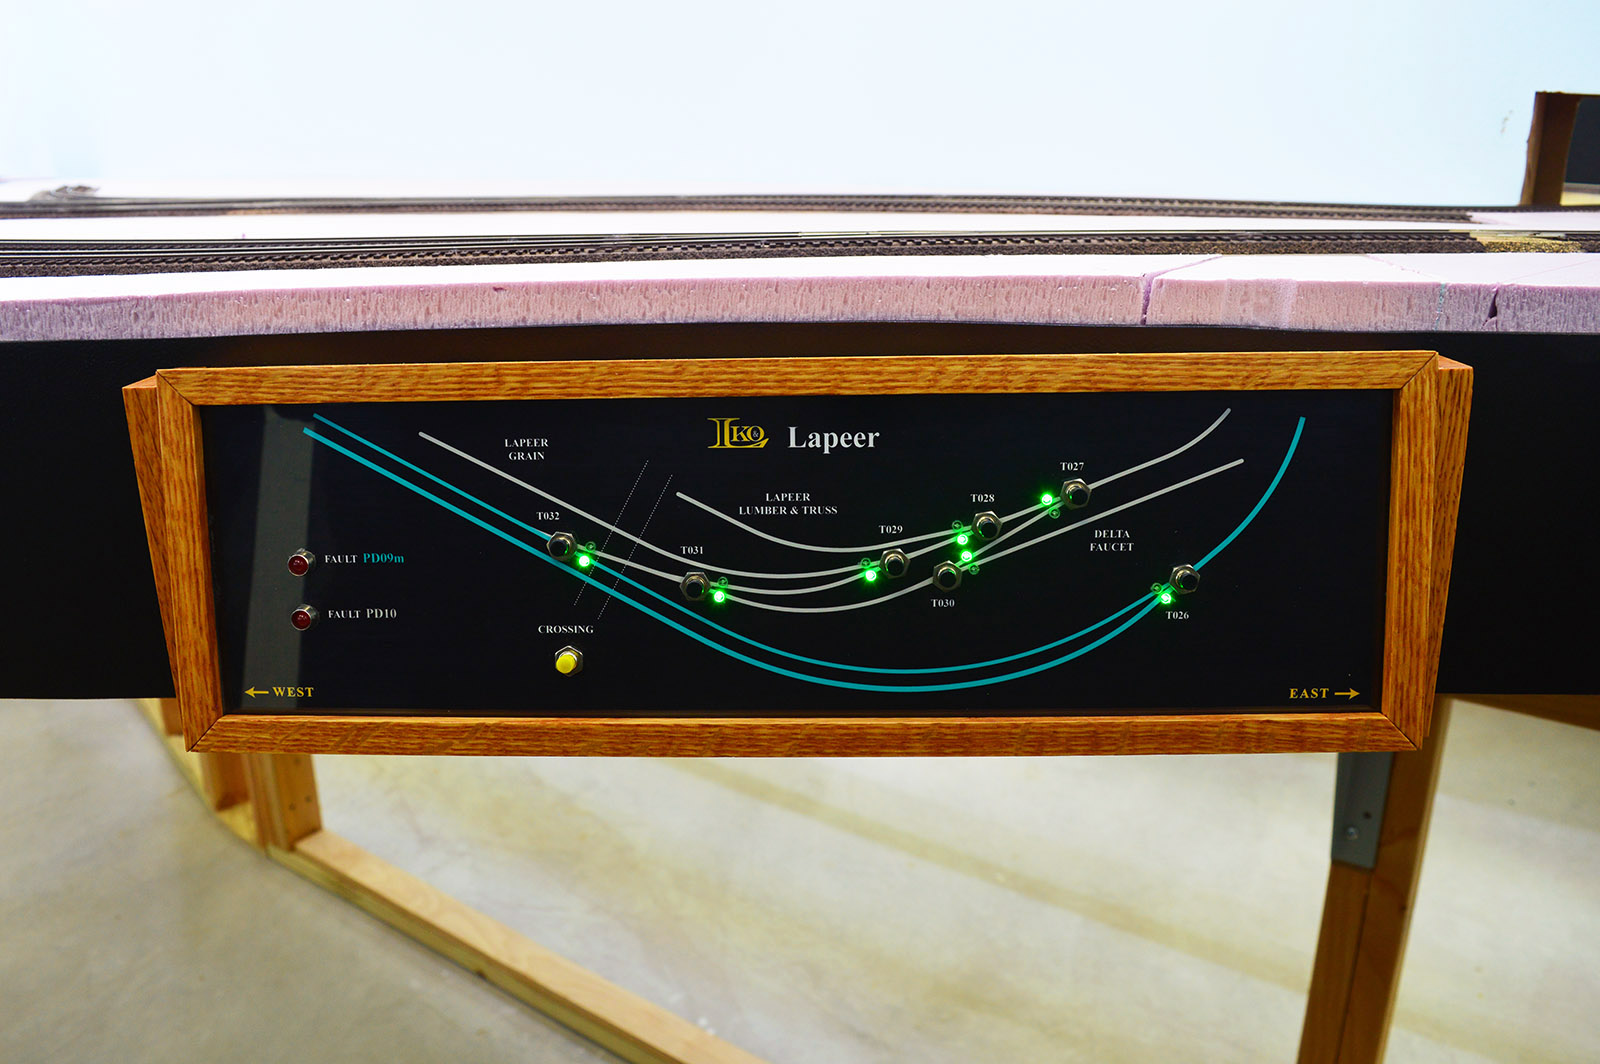
Let’s use Lapeer as an example.


Zoom in on the area of interest for the particular panel. Select the required track segments (red) and copy.
Create a new Illustrator art board (file) that matches the size of the desired panel face. In my case the art board (panel face) is 15-3/4″ x 4-3/4″. Paste.
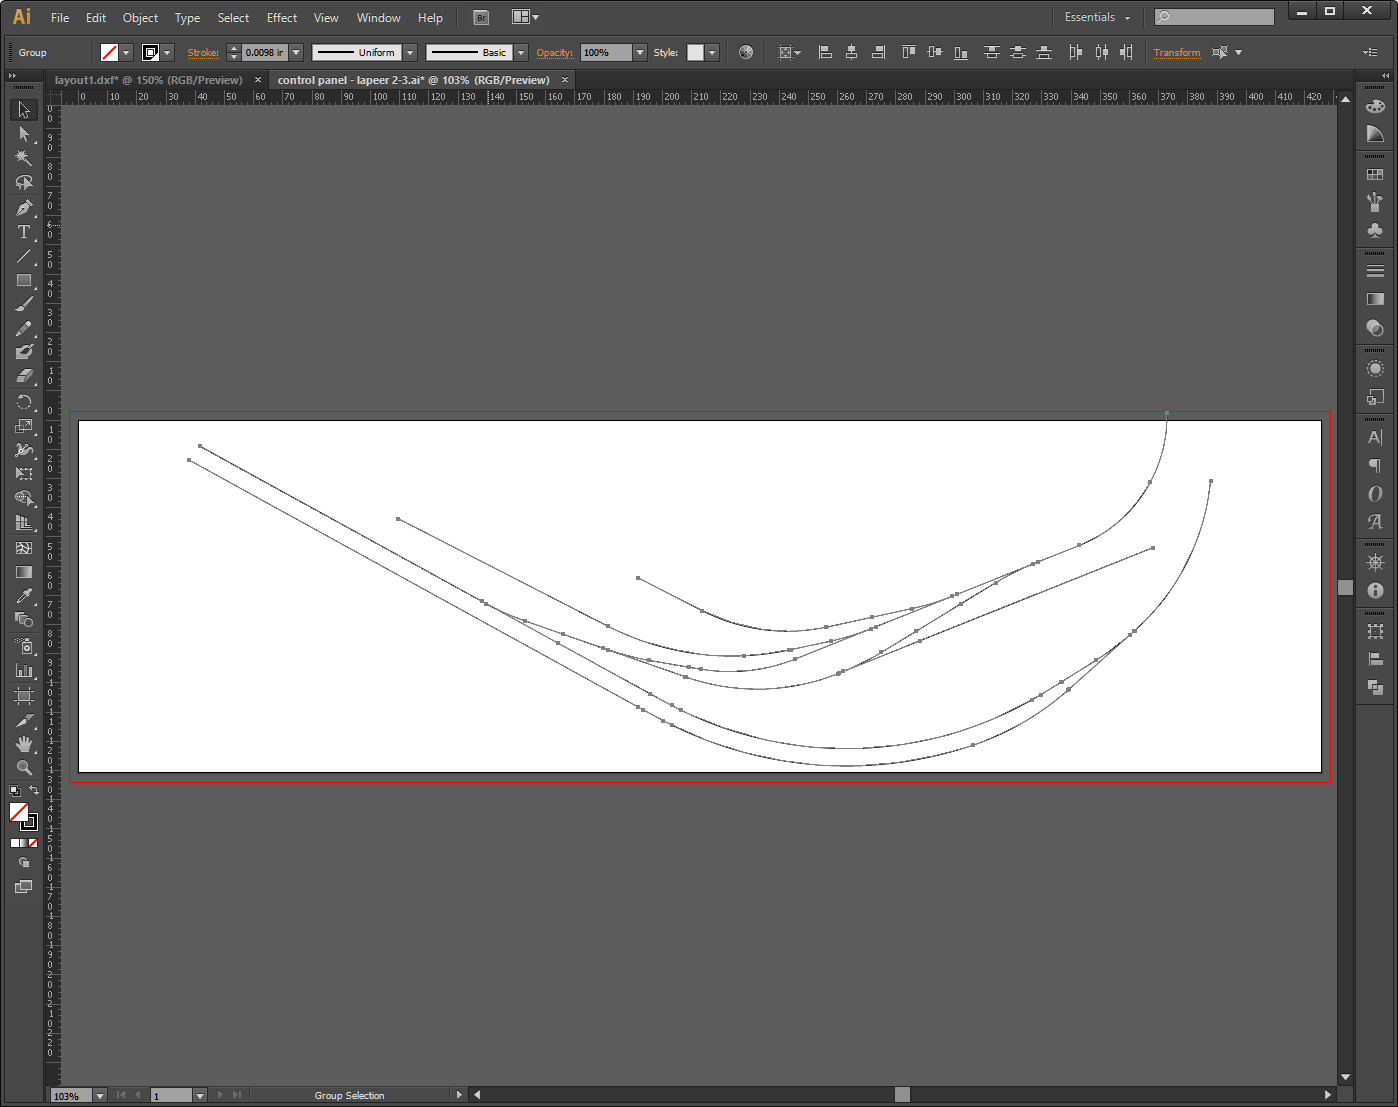
Resize and adjust the position of the pasted track segments for best fit on the panel. Make sure all track segments are selected when you move and size otherwise you will distort their relative position to each other. Snip off lines that are too long or are not needed. Depending on how you mount the panel, you may need to leave some blank space around the edge. My face panels slide 1/4″ into a slot in the wood frames so that 1/4″ loss around the edge must be taken into consideration when positioning the track.
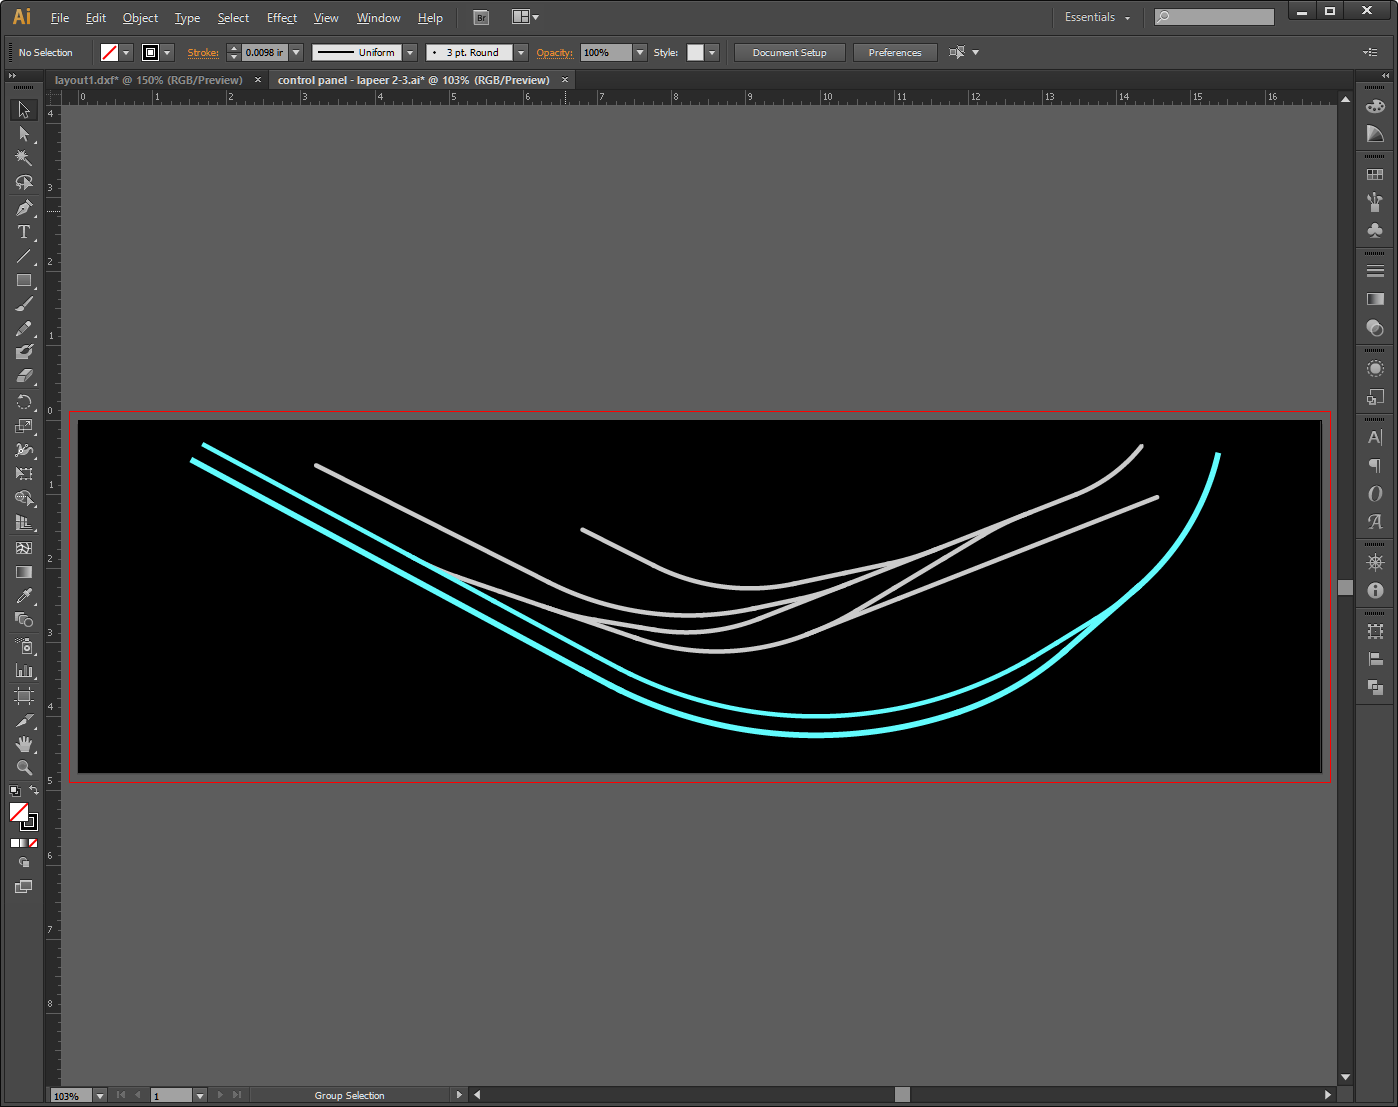
Time to let the creative juices flow and make some good looking art. Add a background color, black in my case. Select line weight and color for the track. I use cyan at 2mm for main lines, light gray at 1.5mm for all other track.
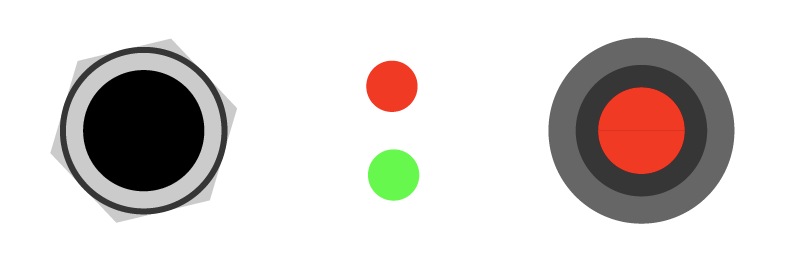
At this point it is good to know if physical controls will fit properly. To help with that I measured the three different controls my panels use and then created outlines of them at actual size. Nothing artistic, just useful representations. It’s the accurate dimensions that are important. Push button with rear hex nut, spaced 3mm LEDs, and a LED bezel with rear retainer. A little dash of color and we have these simple vector objects.
Copy paste as many control illustrations as needed and position them on the panel to your liking. Change the color of an individual pasted object if needed. For instance, my grade crossing defeat switch is yellow.
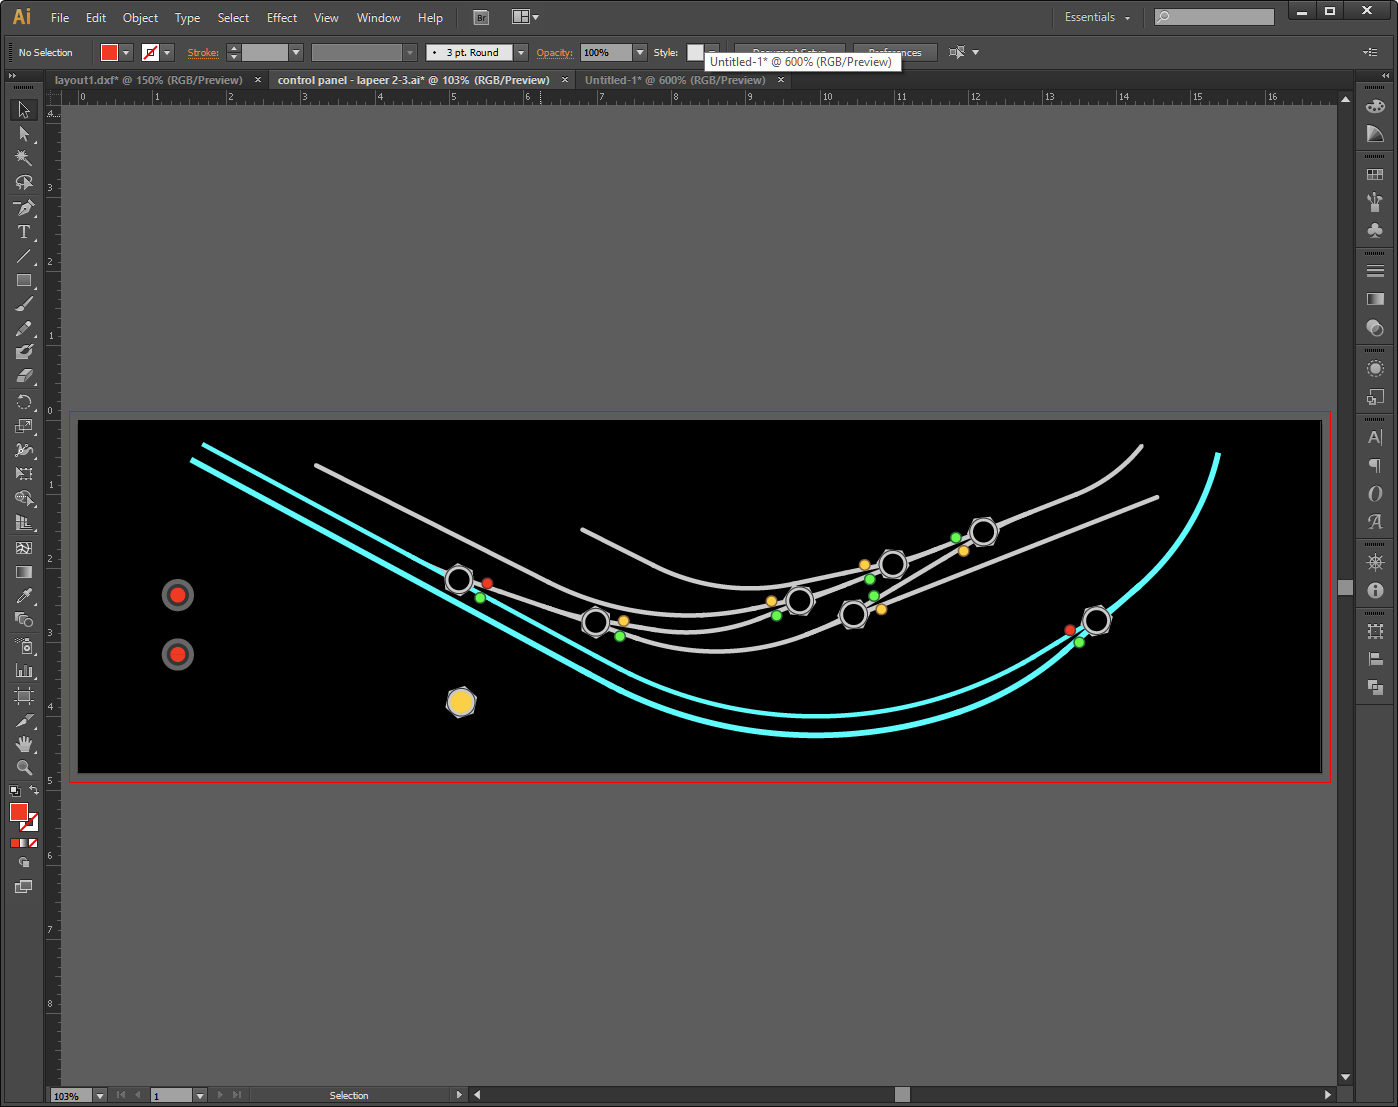
Add text labels and any other artwork you want. For me it is the railroad logo with panel title, east west arrows, key industry identification, and dotted lines for the grade crossing. I even put the wood frame on it to help me better visualize a finished panel. Keep moving things around until it all works for you.

While none of the control objects get printed, being at actual size and representative appearance really aids in the design process. Makes it visual and guarantees it will physically build. It is as close as you will get to seeing exactly what the finished panel will look like.
At this point we have an accurate, actual size illustration of our panel. Hide the items that don’t get printed (switches, LEDs, bezels, wood) and we get this. Time to print.

Inkjet Print
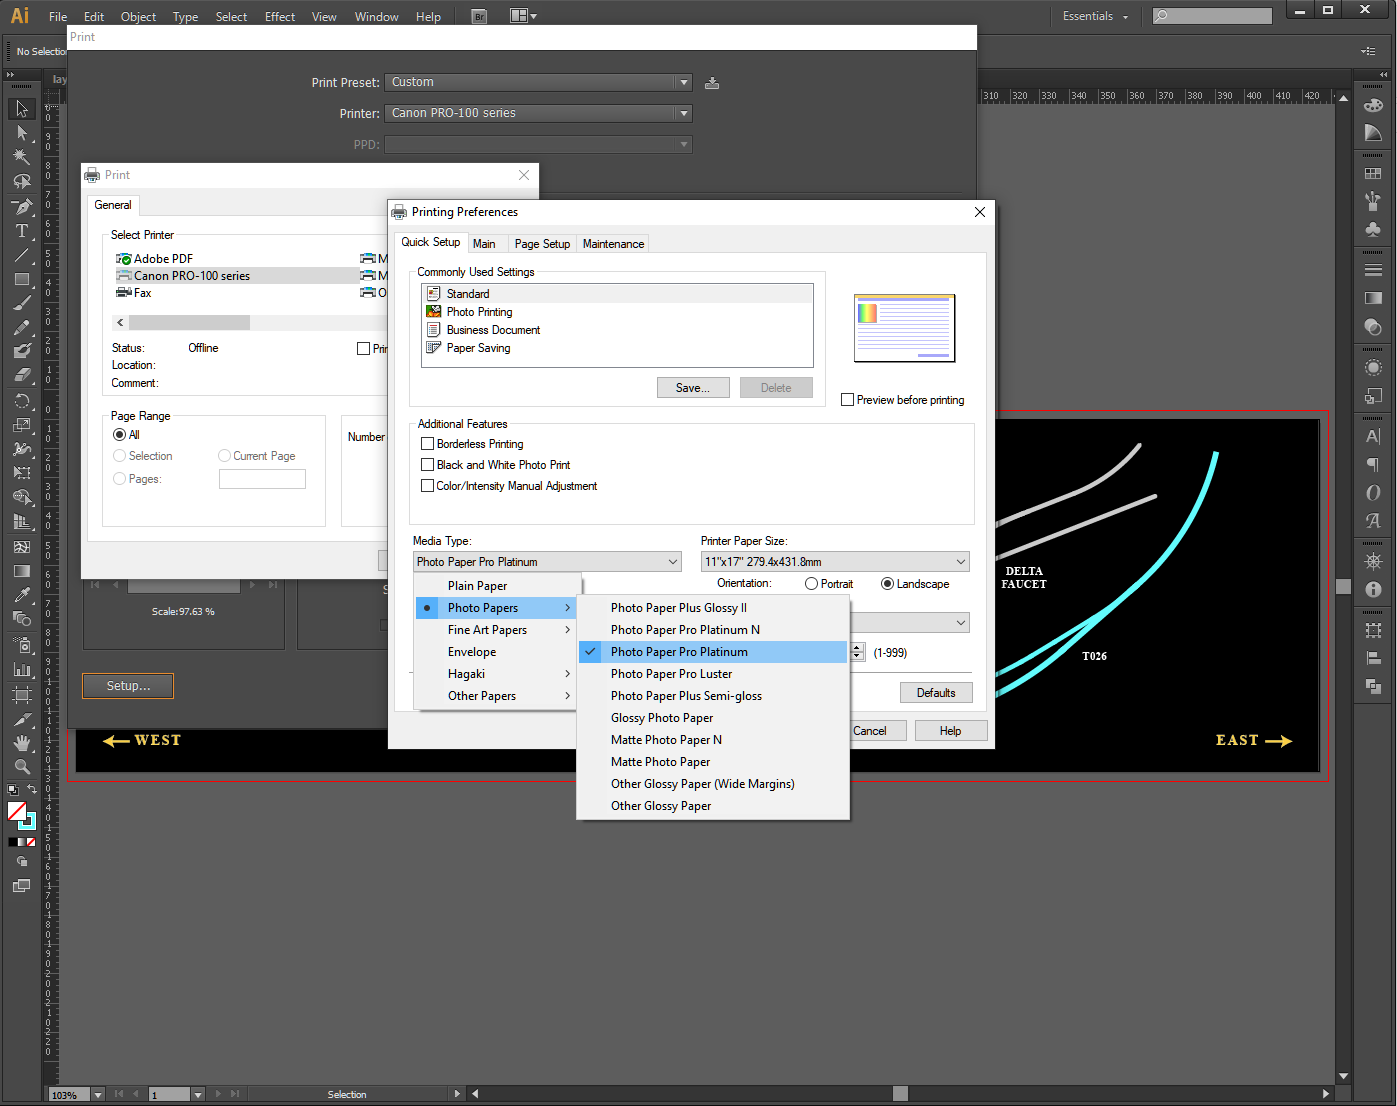
I imagine just about any inkjet printer will do the job. What I believe is more important is the paper you use. Brand name, high gloss photo paper is what you want. If you have a big brand name printer such as Epson, Canon, HP, or similar then use the corresponding brand of paper. Each manufacturer includes in their machines built-in printing profiles for their own brand of papers. My printer is a Canon PRO-100 and I use Canon Photo Paper Pro Platinum. In the picture below you can see the built-in profile. Otherwise, set the printer to its maximum quality photo printing and let her rip.
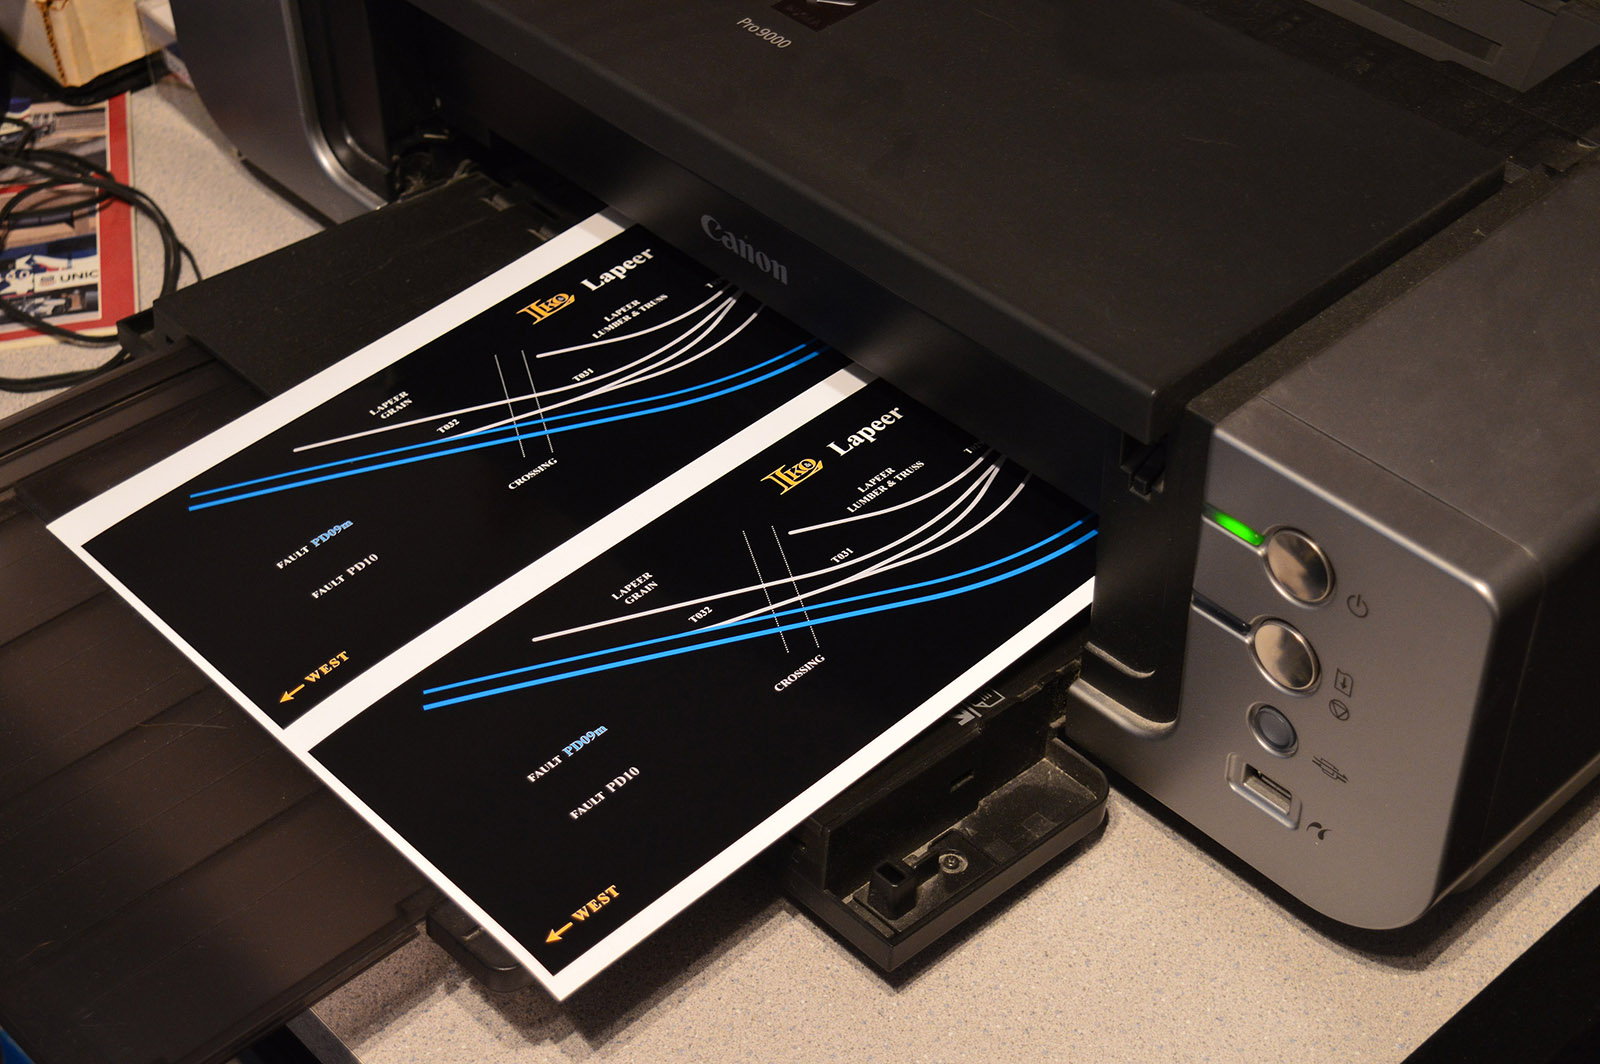
Let the print dry overnight just to make sure you don’t smear it. Trim with scissors and you are done with the pretty part.
Drill File
The illustration you just made will also serve as drilling templates.
- Hide the black background.
- Create a new layer in your Illustrator file.
- Copy paste the track and the controls (switches, etc.) to the new layer.
- Change the track to a thin gray line.
- Create a standard bullseye for each size control. Nothing more than a circle the diameter of the drill with crosshairs in the center.
- Copy paste as many bullseyes as needed aligning one to each control.
- Hide the pasted-in controls and colored track objects.
The result should be something like this.
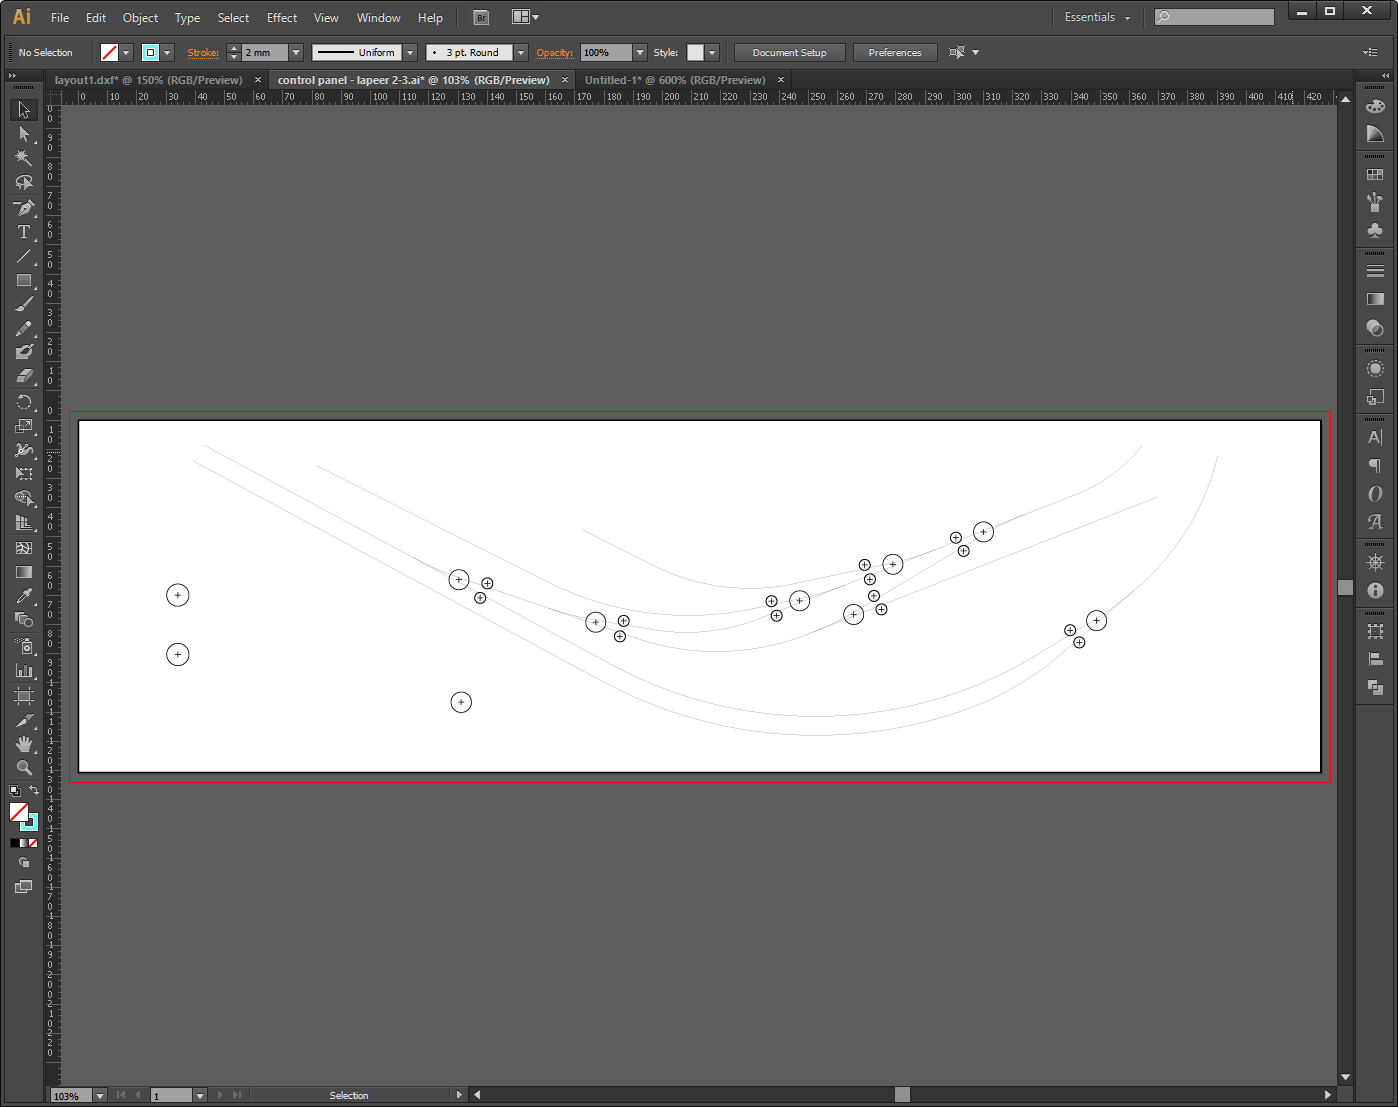
Add any labels or notes that will come in handy when drilling.

Print on plain white paper. The drills will align perfectly with the art because they are stacked objects in identical positions.
If you are using the same sandwiched panel face construction method as I did then you will need two drill prints – one for the LED retainer layer (0.030″ spacer) and one for the rear layer (0.090″ plastic). The drills are slightly different sizes between the two. More detail here. Technically, you need just one drill print because the only drill that goes through the paper is the small pilot drill. The two drill prints are there more as notes to make sure you drill the proper size finished hole in the proper panel.

Wrapping Up
Lloyd, you specifically asked about making the track curves perfect. As you can now see we don’t actually make any track curves. XtrackCAD made the perfect curves. We simply applied artsy enhancements to the lines. A nice benefit is the track lines on the panel are exact replicas of the how the track is actually laid out since XtrackCAD also provided the printed track plan. You and I are probably the only two people on the planet who have control panels that are 100% accurate right down to curve radius, easements, and frog angles!
Good luck and enjoy the journey.

Hi Alan,
Thank you so much for your explanations. I really didn’t think you would go in so much details, but you sure did answer any other questions I might have, but I do have one. My layout was design with AnyRail, that’s no problem as I can make the pictures fit. Your answer about the vector graphics woke me up. The question is, I have a color laser printer, is this good or should I go with Ink Jet?
Have a Happy Thanks Giving
Lloyd
Lloyd,
That all depends upon your print quality expectations. Inkjet generally create higher quality photo prints than do laser. There is also a wider selection and better quality of papers available for inkjet.
Print something on your laser on good paper. If it satisfies you then use it. If you want something sharper and more vivid then use inkjet.
Alan,
I don’t have Illustrator, but found a free program that does almost everything, it’s called Inkscape. I’m almost done with drawing all my panels. Next is the test prints on laser and Inkjet. Ahain Thank You
Lloyd
Awesome explanation Alan, great idea with the drill file too…!
Jas.