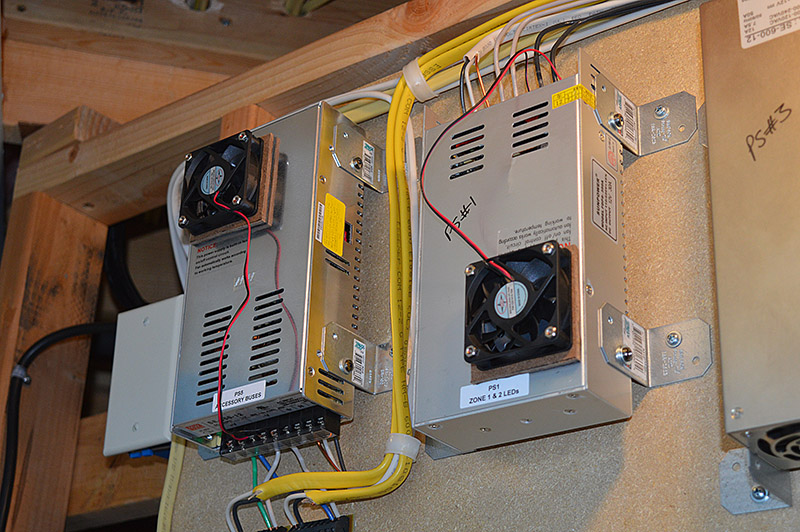
Funny what our brain does with the signals coming from our ears. Case in point. The layout lighting LED strips are powered by switch mode power supplies. The power supplies have internal fans that turn on when a predetermined temperature is reached. In operation the fans are constantly cycling about every 2 minutes. On for 30 seconds, off for a minute and a half. Repeat. Add to this the two power supplies are not in sync with each other. One must be running just a tad hotter than the other. The fans are quite noisy as well.
Why does this matter? It was driving me nuts! Just about the time my mind would begin to ignore the whir of fans they would shut off. Same when they were off. Just as I got used to the quiet, on they came again. My brain was trying real hard to ignore them as background noise but the fans had other plans. Every 2 minutes they reminded me of their existence.
At first I thought about opening up the power supplies to bypass whatever circuit is controlling the fans. Hard wire them to run all the time. Then I had a better idea. On eBay China, my favorite shopping destination, I found little muffin fans advertised as super quiet. They were 60mm diameter same as the original fans in the power supplies. At $1.75 each with free shipping how could I refuse.
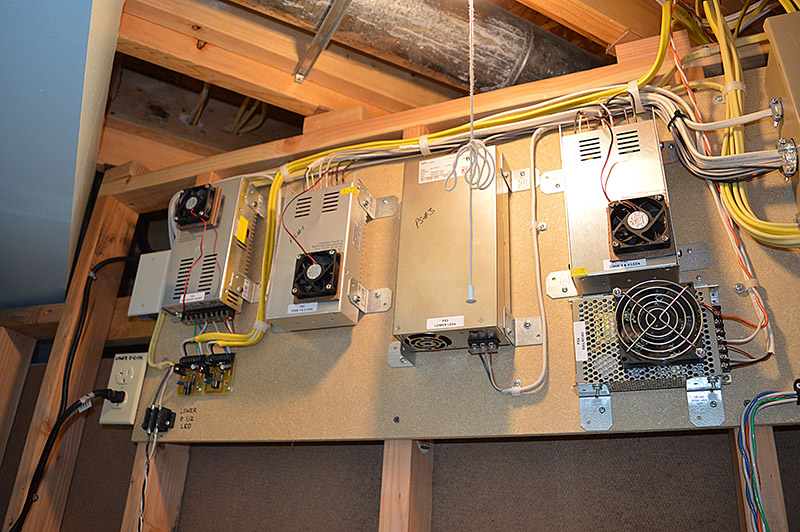
The fans arrived and yes, they are much quieter than the original fans. I hustled up mounting flanges out of 1/8″ hardboard, mounted the fans to them, and then stuck the assemblies over the original fan holes with 3M permanent strength double sided tape. While I was at it I did the Accessories Bus power supply also.
What a nice difference. Now there is a low whir of fans running continuously. After being in the room for a few minutes, the fan noise fades away into background noise that your brain magically cancels out. Ah, pseudo peace and quiet.
Interestingly enough, the new quiet fans must move enough air to keep the temperature below the original fan turn on point. I had the layout running for over two hours and the original fans never turned on. I can live with that.

The brute 40A Mean Well power supply that runs the whole of the lower deck LED strips already has a nice quiet fan that runs continuously so I didn’t have to mess with it. The oversize fan I added to the track power supply is a 24V unit running on 17V so it makes no noise at all.
Fans on everything, temps under control, low noise level, and no cycling on and off. I am calling this little project a major success.
